There's an official Fallout TV show prop. It's hackable.
OK, we're doing something a little different with this one. But first the preamble.
The Preamble
19/03/2025
So I haven't cosplayed properly in a while. I did it prettyu regularly in 2023, but 2024 was a nadir for me menty h and cosplay, with its ill-fitting, itchy fabrics that are not designed with trans people in mind, was not gonna help that. I didn't go to many cons, those I did I avoided being in cosplay, yadda yadda.
Thing is, is I do actually really like cosplay, when I'm of the frame of mind to do it. I like prop work. I like wearing the clothes Cat has designed for me. It's fun when it's not autistic agony.
You may have noticed I've got mad into Fallout of late. See the previous entry on this blog. I've loved Fallout for a long time but never really considered cosplay for it, not really sure why.
But this dive back into the series coincided well with me wanting to get back into cosplay proper. And because I want to do it properly, I've gone a bit all out.
I've ordered a reaaaalllly nice vault 33 suit, with backpack. I'm gonna dye my hair instead of wearing a wig, which is the worst thing sensory-wise for me in cosplay.
And, I made a Pip-Boy! Look at it here, it's pretty great!
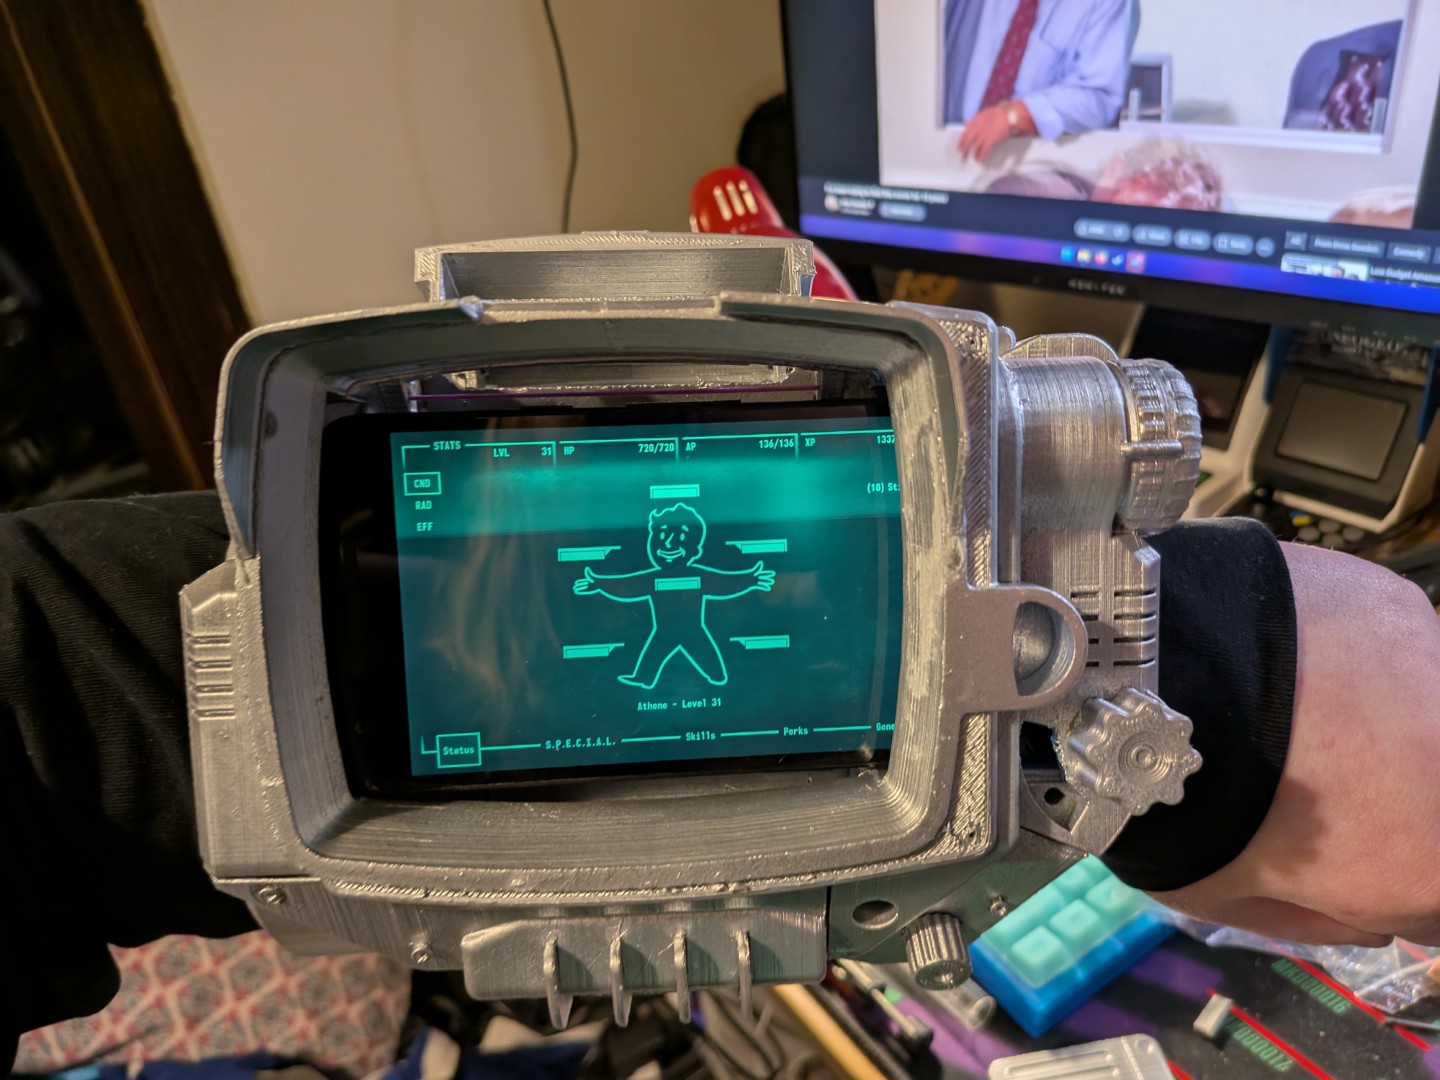
It's also absolutely fucking massive.
Wearing it is deeply uncomfortable and my arms get tired after mere minutes, let alone the hours of continuous wear a con would require. It's impractical.
There is, however, a solution. Bethesda and 'The Wand Company' produce a screen-accurate version of the tv series hero prop, which normally wouldn't particularly interest me, as often screen-accurate props are just display pieces and are non-functional.
Props I use for cosplay need to have flare. I use LEDs to make them nicer, or in the case of my own homebrew pipboy, I was using a phone with an android app that mimics the Fallout 3 pip-boy interface, fully interactable. That's cool! And it's a showcase!
But luckily this prop also actually works. It features a lot of animations from the tv show, but more to the point, all the dials on it function and are used to interact with it. It's really excellent.
It's expensive, though, and that alone wouldn't have been enough to sway me. That is, until I did a little bit of digging and discovered that the firmware is customisable, supporting custom applications out of the box.
That's basically a red rag to a bull for me. I love writing software for esoteric things. I mean. Look at the projects on this website. Two of them use a midi device and one of them is a plugin for a videogame. I've also written plenty of software for and interfacing with embedded hardware. This is simply made for me!
But if you click through the link at the top there, you'll notice that there's basically nothing in the repository right now. That's because, dear reader, we're gonna be exploring this hardware TOGETHER. IN REAL TIME.
There's a sequence at the start of the social network where zuck liveblogs him making facesmash. A lot of what he writes is despicable, and the concept of facesmash is awful, but I dfo love the idea of liveblogging a project. It's not something I have really done before. So we're gonna do it with this one.
It's a good candidate. There's some documentation at the above link, but not a lot, and there's lots left to explore in terms of how the system works. The author of the above linked article makes an assumption, for example - that the graphics context should be one bit per pixel - but I don't think that's actually the case. There are different tones in the monochrome screen, and it doesn't look like they're made using dithering. So how are they done? That's jsut one of many questions we will explore together.
My ultimate aim here is to put something like the in-game stats screen together. When I was setting up my homemade pip-boy, I put some funny and personaly jokes into what stats and perks I picked - being able to replicate them here would be really nice.
There's a long walk between here and there, though, so strap in.
However, let's get one thing straight here - I'm not a teenager in a university dorm running on monster energy and rage. I'm a 31 year old woman with a full-time job and a bedtime.
So the 'liveblog' will not be me hacking away at this until 4AM, oh no no. I will be working on this off and on over the next few weeks most likely, and keeping this post updated as I go.
I am sure you will agree that this is a much healthier choice.
Beginnings
19/03/2025
OK, so, the device itself. This is a boutique prop with functionality that, while not an afterthought, is certainly not economically worthy of any kind of custom silicon. This is a collector's item, there's only a few thousand of them made, best to use something off the shelf.
And, indeed, it does! An STM32 to be exact, an absolute classic bit of IC hardware. The STM32 series are ARM microcontrollers, architecturally similar to the hardware in your common or garden smartphone. ARM is wonderful because it's somehow managed to succeed in all 3 corners of the 'you can only have two' triangle: it's [relatively] quick, it's cheap, and it's Good. It also sips power relative to bigger, more traditional chips, but that's true of any microcontroller, really, so shouldn't really be counted as a strength here.
I was a smidge surprised to see an ARM chip in this - if this were a homebrew project you'd expect probably an arduino, an RP2040 or maybe a teensy - but this thing does have some relatively complex graphics to drive.
I imagine the main reason this was chosen, however, was hardware video decoding capability. Most (maybe all?) of the show-derived animations are video files on-disk that are just decoded and straight to the graphics context. You can argue this is cheating if you want but to me it reeks of sensible design. Instead of requiring the programmers to design and animate elegantly in a very inelegant context (we'll get to that, believe me), you get the raw files made for the show, re-encode them, and plonk them on. Easy!
Additionally, the raw power the STM32 chip here has allows for a less conventional (but friendlier-ish) development context. This chip uses Espruino.
Espruino is javascript for microcontrollers. Some of you may have just hissed, and you'd be right to. Javascript is, pretty infamously, horrible. It's heavy and unwieldy, it's untyped, it's messy, it's functional-but-not-quite. If you want an example of how not to design a programming language, you need look no further than javascript. Yet because it runs in-browser, it is the most common language in the world. Go figure.
Some of the words in that paragraph may have you convinced that javascript is a bad fit for the lean, high-performance world of microcontrollers, and really, you'd be right. But that hasn't stopped the most insane people alive, javascript monodevelopers, from crowbarring it into them anyway. And so: Espruino.
Cards on table, I've never used Espruino before today. I've touched basically every other microcontroller going, and everything else uses C++. I'm not a great C++ programmer, but I can get by.
Comparative to my javascript, I might as well be the Bach of C++. I do not like promises, I think throwing all your code to 'some indeterminate point in the future' is a horrendous choice, but it's what we have to work with here, so we go with it.
The thing is though, in this case, this is actually a fairly massive strength. Because Espruino is a JS interpreter, it will run any valid JS you throw at it. This means you can actually program it interactively from a serial connection, which is pretty snazzy. Here's me throwing some debug code at it purely from the terminal and seeing it display the results in real time.

It also means we can dump the firmware with one line from the terminal and, instead of being binary and unreadable, it's in regular-ass javascript. Holy shit!
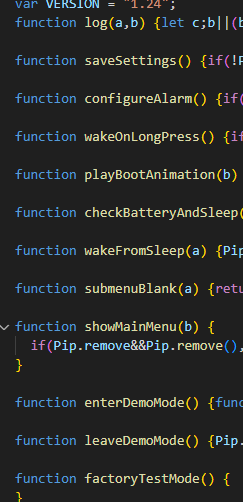
As mentioned, the guy in the link above has already done this to some extent, but I want to dig through a bit further and understand a bit more what's going on. There's some very interesting functions here that I wanna figure out.
For legal reasons, I can't share this firmware wholesale in the repo, so you won't be able to see precisely what I'm talking about. As we go, however, I'll screenshot various parts of the code so you, reader, have context. Like the above!
Anyway, I think that's where I'm leaving it for tonight. It's 11pm, after all. More tomorrow.
Let's get some images displayed
20/03/2025
OK, it's 6pm, there's 3 hours until the Apprentice is on, let's get hacking. The first thing I need to do is, uh... take the thing apart.
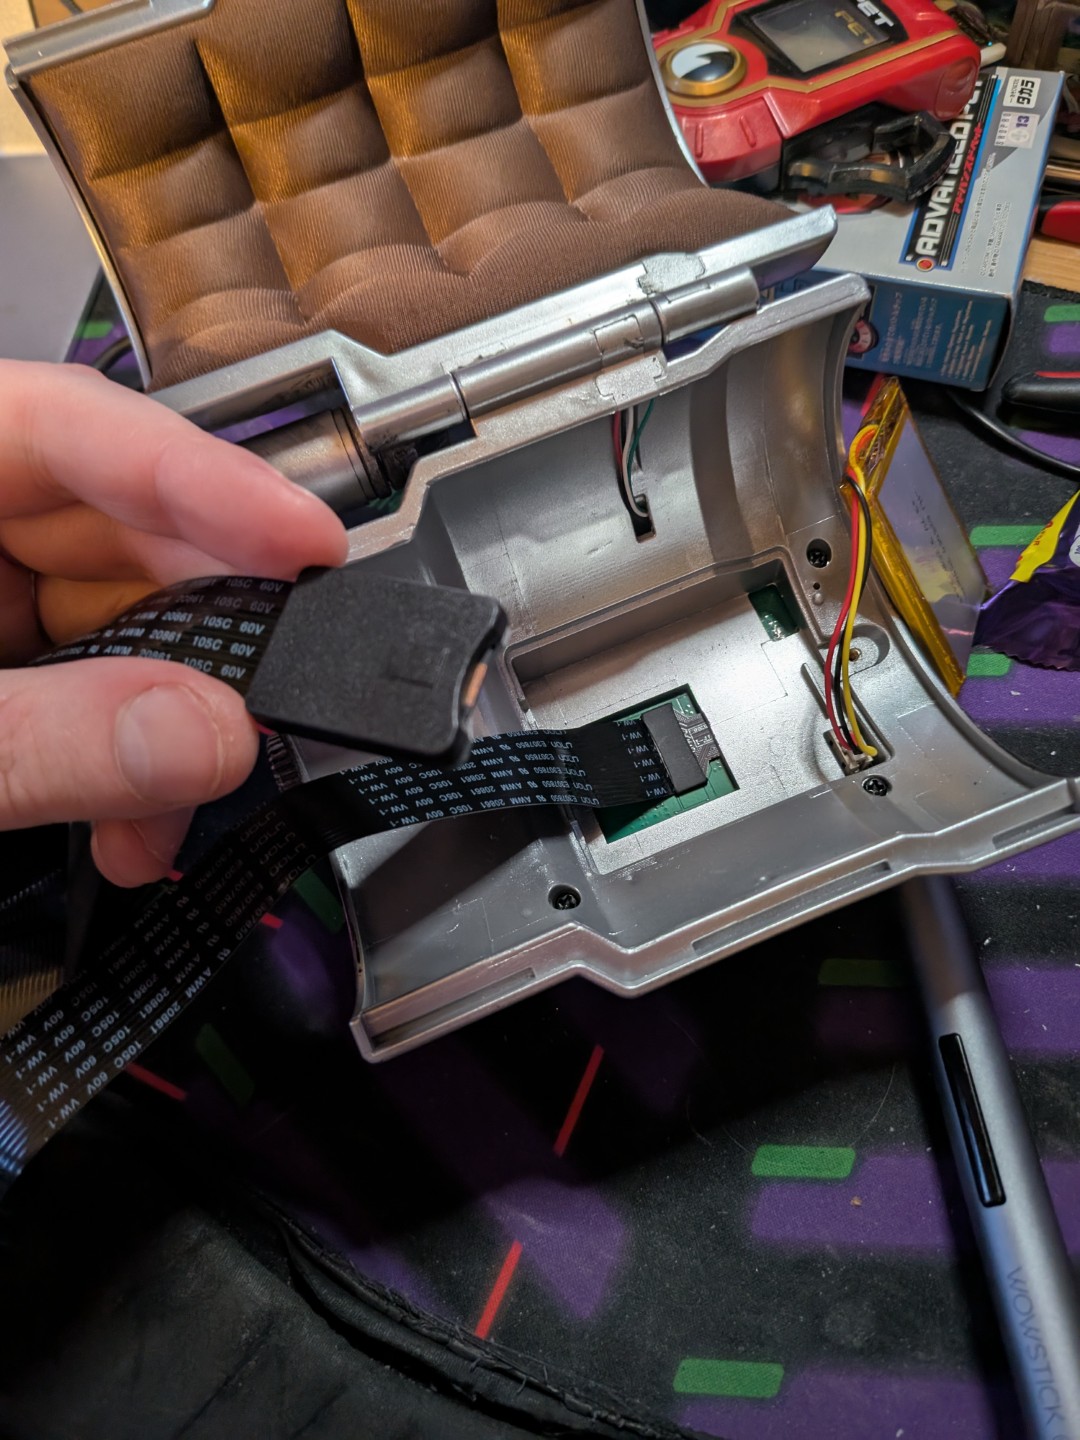
That's an micro-sd extender cable stringing out of it, there. Nearly everything that makes up the pip-boy is stored on an sd card which is, conveniently, not bolted into the board.
You can open up the thing and take it out, you can copy all of its files over to a folder and, most usefully for us, you can copy those same files over to another, bigger sd card (the one installed is only 250MB) and it works, as long as the card is fat32 formatted.
I've put a 32GB one in there, which is overkill, but I had it lying around. It also means I can put the entirety of the FO3/4/NV soundtracks on there, if I want. Which, maybe, I do in future! Who knows.
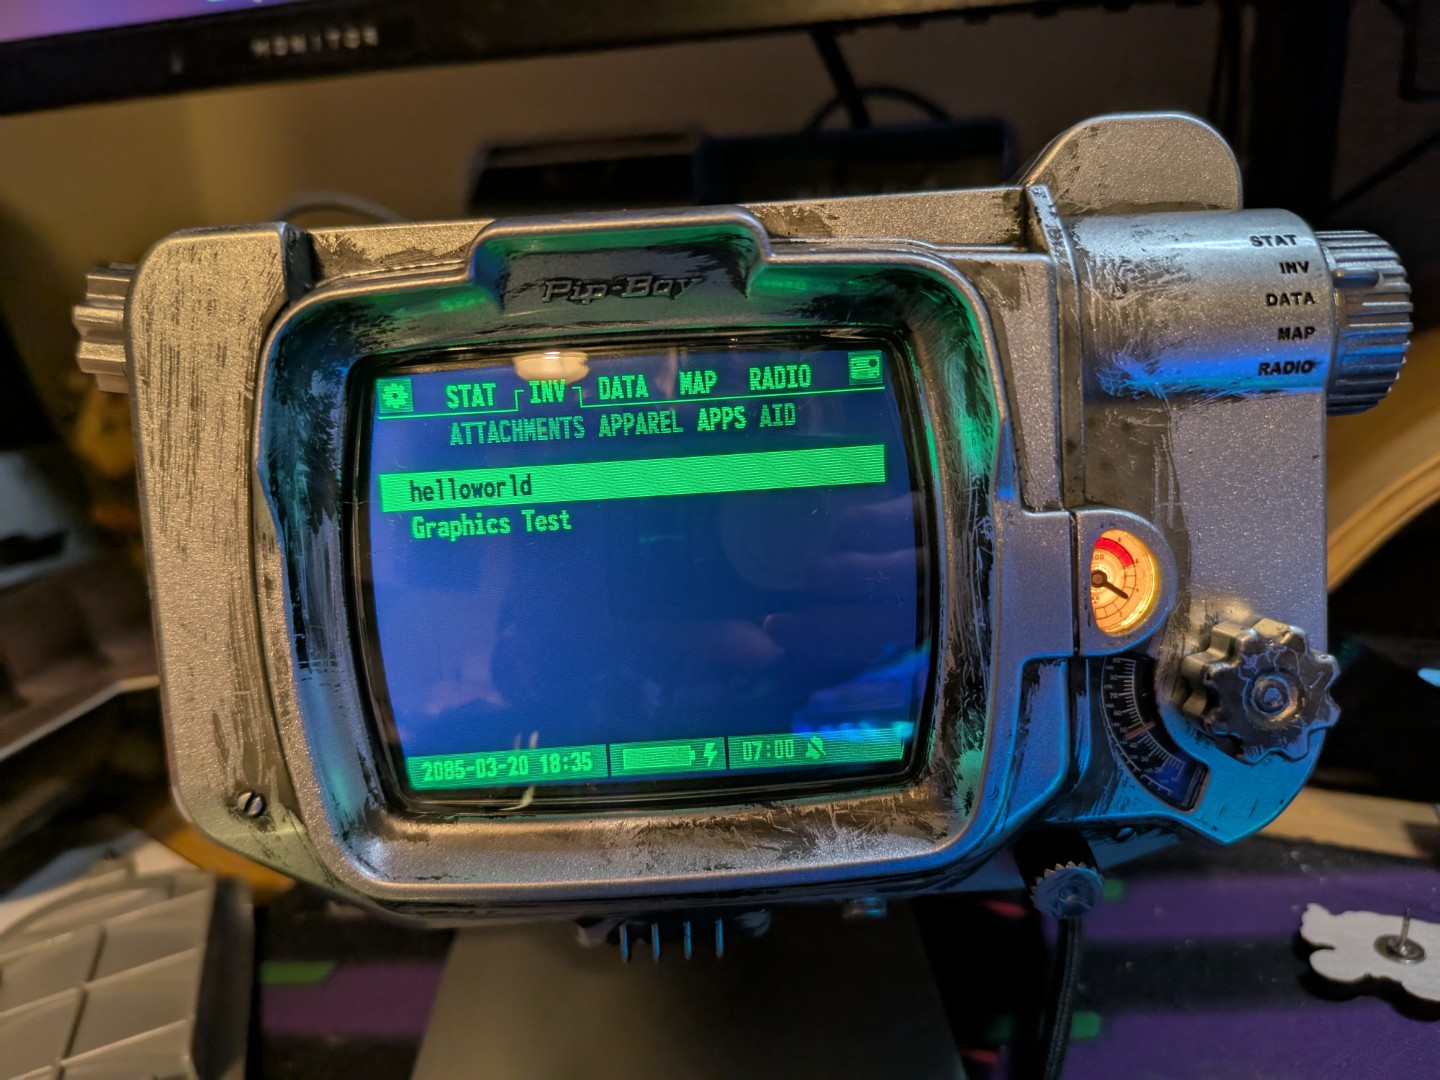
More importantly, however, that SD card has a USER/ folder where we can drop our own custom javascript files and it'll display them in a nice 'APPS' menu in the INV menu.
We're gonna start with the the helloWorld and graphicsTest files that are currently in the repo. Some file wiggling and inserting and removal of SD cards and bang, there they are!
So we want tio draw something to screen that isnt just text, next. So I need to dive into some docs. More updates in a bit...
Code Updated. Check the github link to keep up.OK, first thing I want to do is draw a square. Which means we need to understand how the graphics buffer is working. See, right here, in the dump of the buffer of the main portion of the screen, is some interesting evidence.
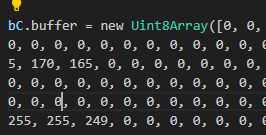
The interesting thing here is 'UInt8.' This is an array of 8bit integers. This could mean the pixels are rendered as 3-byte RGB values, with the r and b just ignored, or it could mean each bit in the byte is a pixel, and the different tones is achieved using dithering. Right now, I'm not sure!
So, to find out, we're gonna draw three squares.

And there we have it! Three squares. Now if we look at the code I've written, and note that the middle square is the dimmest of the three, we can deduce...
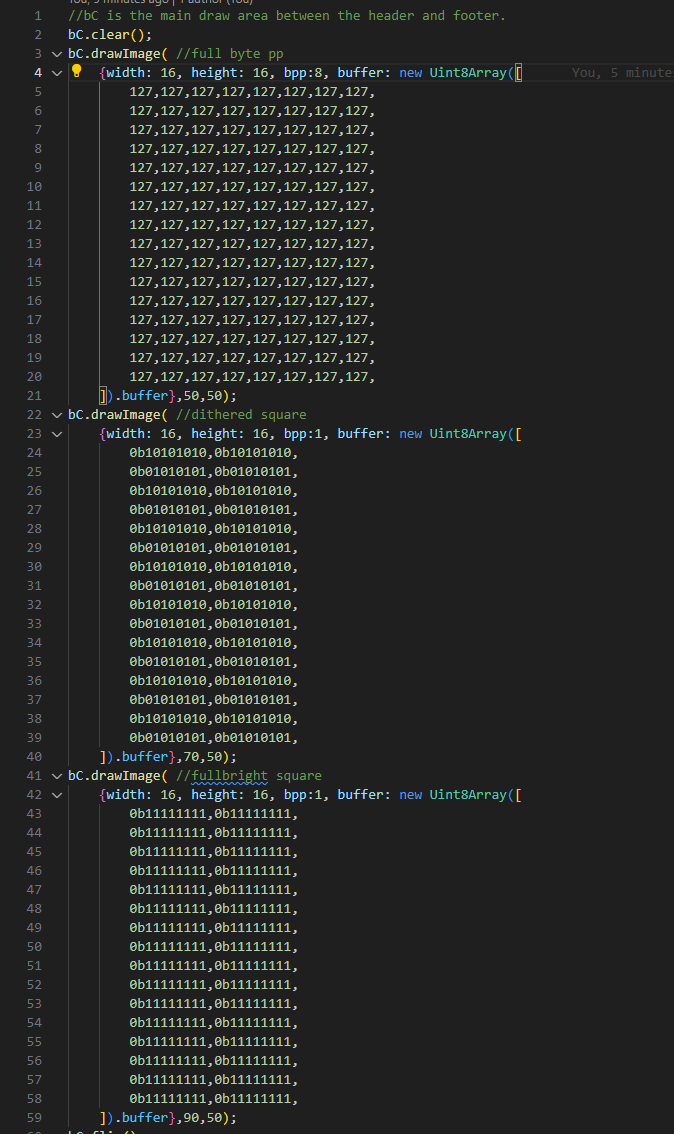
That I was completely wrong and the screen is compeltely monochrome, and any dimming is done by dithering. I'm so glad I'm liveblogging this so everyone can see how stupid I am.
That's ok though! We're here to learn, and this actually makes things relatively nice and easy. I'm sure there are monochrome image -> uint arrays somewhere out there one the web already, thisn is a very common format on embedded platforms, so I just need to find one and run the icons for various perks etc through them, and we can get one displaying.
in fact, maybe that's what we do next. BRB...